


Table of contents
Normal Usage of Web Applications
Command Injection မှာတော့ အများကြီးရှင်းပြဖို့သိပ်မရှိဘူးဗျ လွယ်လဲလွယ်သလို တွေ့ဖို့လဲ ခက်ပါတယ်။ ဉပမာပြောရရင် command injection ဆိုတာက ကျွန်တော်တို့ server တစ်ခုရှိမယ်ပေါ့။ Server အမျိုးအစားကတော့ History အကြောင်းလေးပေါ့ဗျာ။ အဲ့ server ထဲမှာ နိုင်ငံထဲက သမိုင်းကြောင်းတွေကို သိမ်းထားမယ်ဆိုပါစို့။ အဲ့တော့ အသုံးပြုသူက Pyay မြို့ရဲ့ သမိုင်းကြောင်းကိုသိချင်လို့ Pyay လို့ရိုက်ရှာလိုက်ရင်။ ကျွန်တော်တို့ sever ထဲမှာသိမ်းထားတဲ့ pyay.txt ဆိုတဲ့ file လေးကို ထုတ်ပြလိုက်မယ်။
ဒါကအဆင်ပြေတယ် ပြသနာကတော့ - တစ်ကယ်လို့များ ကျွန်တော်တို့ရဲ့ website က အသုံးပြုသူလာရှာတဲ့ အကြောင်းအရာတွေကို စစ်ထုတ်ထားမှု မရှိပဲ ဇတ်လမ်းအကြောင်းအရာတွေကို ထုတ်ပြချင်တိုင်း ထုတ်ပြနေရင်တော့ ဘယ်ဇတ်ကောင်က ဘယ်လိုဇတ်လမ်းရှိတယ်ဆိုတာ တိတိကျကျခွဲပေးနိုင်ခြင်းမရှိတော့ဘူးပေါ့။
ရှုပ်သွားလားမသိဘူး xD.... ပြောရရင် ကျွန်တော်တို့ website မှာအသုံးပြုတဲ့သူက Linux command line ဖြစ်တဲ့ "cat" ကိုသုံးပြီး အကြောင်းအရာတစ်ခုကိုရှာတယ်ဆိုပါစို့။ ဆိုလိုချင်တာက ကျွန်တော်တို့ရဲ့ အကြောင်းအရာ နာမည်ကို ရိုက်ပြီးရှာတာမဟုတ်တော့ဘူး။ cat ဆိုတဲ့ command နဲ့သုံးပြီးရှာလိုက်မယ်ဆိုရင်လည်း ကျွန်တော်တို့ သေသေချာချာစစ်ထုတ်ထားခြင်းမရှိတဲ့ website ကလည်း ထုတ်ပြမယ်ဆိုရင်...
eg : pyay.txt; whoami
အပေါ်ကလိုရှာလိုက်မယ်ဆိုရင်တော့ ပုံမှန်ရှာနေကျ စာသားတွေအပြင် server ကက ရိုက်ရှာသမျှကို command လို့သတ်မှတ်ပြီး ပြန်ဖော်ပြနေမှာဖြစ်ပါတယ်။ ဒီလောက်ထိ အိုကေကြလားမသိဘူး။ နားမလည်သေးရင် နောက်ပိုင်း lab ကိုကျွန်တော်နဲ့တူတူလိုက်ဖြေကြည့်လိုက်ပါ။
TryHackMe (OWASP TOP 10 [Task 5])
မစခင်တစ်ခုသတိပေးချင်တာက ခုမှ Try Hack Me ကိုစပြီးဝင်ဘူးတဲ့သူတွေဆိုရင်တော့ Register လုပ်ပြီးတာနဲ့ doc တွေနဲ့ bonus resource section တွေကိုအရင်စစ်ဆေးကြည့်လိုက်ပါ။
Navigate to: https://tryhackme.com/room/owasptop10 → Task 5
5.1. What strange text file is in the website root directory?

Explain :
As this is a reverse shell. Type in the command ls in the console and press submit
Answer : drepper.txt
5.2 How many non-root/non-service/non-daemon users are there?

Explain :
အပေါ်က /etc/passwd ဆိုတာကိုတော့ linux သုံးတဲ့သူတိုင်းသိကြမယ်ထင်ပါတယ်။ ဒါကိုတော့ password တွေသိမ်းထားတဲ့ နေရာ (database) လို့သိထားရင်ရပါပြီ။ ဒါဆိုရင်တော့ ကျွန်တော်တို့က command ဖြစ်တဲ့ cat နဲ့တွဲကြည့်လိုက်တဲ့အခါမျိုးမှာတော့ အပေါ်ကပုံမျိုးမြင်ရမှာဖြစ်ပါတယ်။
ကျွန်တော်တို့ :x:100 ဆိုတာမျိုး return ပြန်ပေးထားတာကို မြင်နိုင်ပါတယ်။ နောက်တော့ကျွန်တော်တို့ file တွေကို စစ်ပြီး သူတို့ရဲ့ home directory ရှိ/မရှိ ကိုစစ်ဆေးပါမယ်။ So, home/$Username
After analysing, we obtain users information that is not root/service/daemon
Answer : 0
5.3 What user is this app running as?
ဒါကတော့ လွယ်ပါတယ်။ ခုလက်ရှိသုံးနေတဲ့ username ကိုမေးထားတဲ့အတွက် အောက်က command ကိုသုံးပေးလိုက်ရင်ရပါပြီ။
whoami
Answer : www-data
5.4 What is the user’s shell set as?
Explain :
The user’s shell is defined in the /etc/passwd file
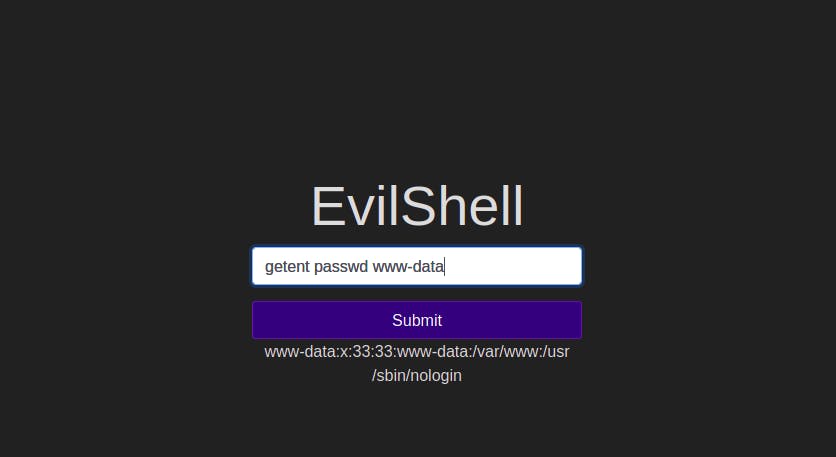
getent ဆိုတဲ့ command ကတော့ linux မှာ အသုံးပြုသူ user ရဲ့ အသေးစိပ်အချက်အလက်များကို ရှာဖွေဖို့သုံးတဲ့ command ဖြစ်ပါတယ်။ Since getent uses the same name of service as the system, getent will be going to show all information, including that gained from the network information sources such as LDAP.
The databases it usually searches in are: ahosts, ahostsv4, ahostsv6, aliases, ethers (Ethernet addresses), group, gshadow, hosts, netgroup, networks, passwd, protocols, rpc, services, and shadow.
type getent passwd www-data and press submit to obtain the user’s shell. /etc/passwd file မှာ ထည့်သွင်းထားတဲ့ ၇ ခုမြောက်ကတော့ user ရဲ့ home directory ပဲဖြစ်ပါတယ်။ user's shell လို့သတ်မှတ်လို့ရပါတယ်။
Answer : /usr/sbin/nologin
5.5 What version of Ubuntu is running?

Explain :
lsb_release -a ဆိုတဲ့ command ကတော့ ubuntu ရဲ့ version ကိုစစ်ဖို့ဖြစ်ပါတယ်။
Answer : 18.04.4
5.6 Print out the MOTD. What favourite beverage is shown?
Explain :
motd အကြောင်းသိချင်ရင်တော့ ဒီမှာဖတ်လို့ရပါတယ်။ Read About MOTD .
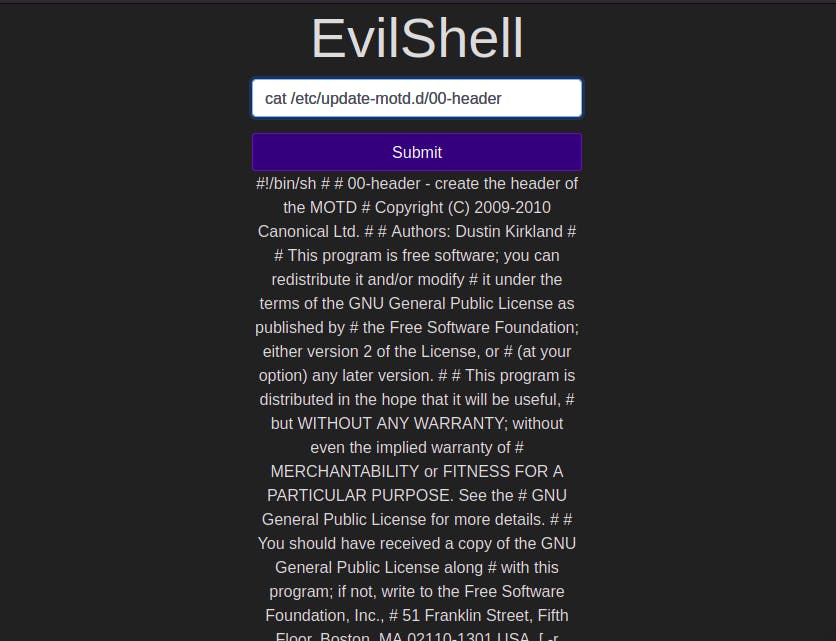
from the hint, we know that the target file is 00-header .
type cat /etc/update-motd.d/00-header
Answer : DR DREPPER
Task 7 ဖြစ်တဲ့ broken auth ကိုတော့ နောက်တစ်ခန်းမှာဆက်လက်ဖတ်ရှူနိုင်ပါတယ်။
What is next?
Broken Access Contro
Security Misconfiguration
HTML Injection
Broken Authentication
Bug Bounty Hunting with Burp Suite (Intercept, Repeater, Intruder)